


Back
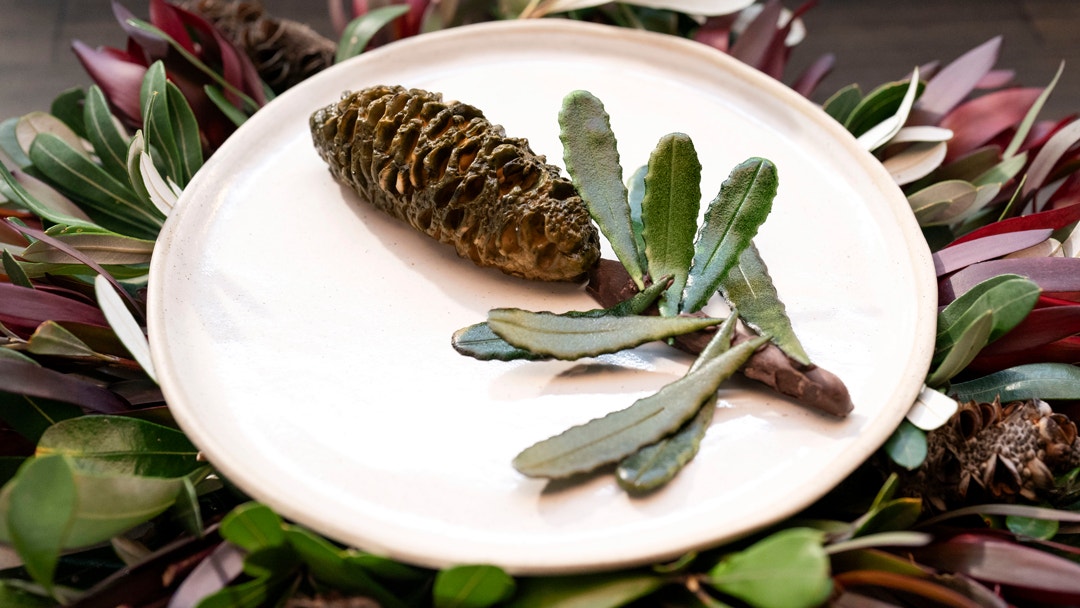
Banksia Pod
- Steps
- Ingredients
Ingredients
Espresso Gel
Coffee Mousse
Macadamia Purée
Macadamia Base
Coffee Mousse (Contd.)
Macadamia Mousse
Macadamia Base (Contd.)
Assembling the Banksia
Wattleseed Caramel
Banksia Leaf Tuile
Wattleseed Chocolate Stem
Painting the Banksia Leaf Tuile
Painting the Banksia Pod
Assembling the Banksia Pod
Select All
Steps
- Preheat combi oven to 160°C, 50% moisture extraction, fan force 1
- Pre-chill blast freezer to -40°C
- Set dehydrator to 41°C with airbrush inside.
Prepare Equipment
- Place each silicon mould (rectangular log 1.4cm x 7.6cm and banksia shaped) onto a baking rack set over a baking tray and place into blast freezer to chill until required.
Espresso Gel
- Add water and honey in a medium-sized saucepan and whisk together over medium heat.
- In a small metal bowl, use a whisk to combine the caster sugar, xanthan gum, salt and gellan gum.
- Gradually whisk the dry ingredients into the water honey mixture to incorporate.
- Using a thermometer, heat the mixture to at least 95°C to ensure the gellan fully hydrates.
- Remove from heat and whisk in espresso until fully incorporated.
- Transfer the mixture to a tray and place into the blast freezer to set, approximately 3-5 minutes.
- Once the gel is fully set - reaching a brittle and firm consistency - transfer it to a small ninja blender and blend for 20 seconds on any setting. Twist the top to assist with scraping down the sides.
- Pass the gel through a fine-mesh sieve. Transfer the resulting gel into a very large metal bowl with high sides and place in commercial vacuum machine.
- Run through a vacuum cycle, stopping the cycle as it swells up and before it overflows. Repeat process until you can complete a full cycle without the gel overflowing.
- Transfer to a piping bag fitted with a plain 7mm nozzle. Lay flat on a tray and transfer to the blast freezer to set for approximately 4 to 5 minutes.
- On a baking paper lined tray, pipe at least 3 logs of gel 7cm in length. Transfer the piped logs back to the blast freezer until required for Banksia Insert.
Coffee Mousse
- Prepare an ice bath in a large bowl, placing a second large bowl on top.
- Bloom gelatine in a small bowl of iced water and set aside until pliable.
- In a medium saucepan over medium heat, combine the cream and espresso and bring to a simmer.
- In a medium bowl, whisk together egg yolk and sugar until combined.
- Pour the espresso cream mixture over the yolk and sugar mixture and whisk well to ensure even distribution.
- Drain softened gelatine and squeeze to remove excess water, set aside.
- Return mixture to medium saucepan and place over medium heat while continuously stirring until it reaches a temperature of 82°C.
- Incorporate the rehydrated gelatine into the mixture, ensuring it dissolves completely. Strain into a medium bowl over the ice bath to cool to 30°C.
- In a small bowl stir the crème fraiche with a spatula then add a little of the coffee cream through to loosen the crème fraiche before adding it back into the cooled coffee cream mixture. Mix until smooth.
- Place back over ice bath and cool to 8°C, stirring occasionally, approximately 10 minutes.
Macadamia Purée
- In a Thermomix, blend the roasted macadamias and salt on speed 9, for 8 minutes.
- Reduce the speed to 3 and slowly add iced water to emulsify.
- Pass the purée through a fine sieve and pour onto a 17cm x 23cm flat tray (it will thicken as it cools). Reserve in the blast freezer to chill for up to 5 minutes. Then reserve at room temperature.
Macadamia Base
- In the bowl of a stand mixer fitted with a butterfly paddle attachment, cream the butter and sugar until smooth.
- Add the egg and 80g chilled macadamia purée and mix to combine. Reserve the remainder of the Macadamia Purée at room temperature.
- Sieve the flour, cocoa powder, baking powder and add with the salt to the mixture. Mix until the ingredients just come together as a dough.
- Between two sheets of baking paper, roll the dough out to approximately 3mm in thickness, transfer onto a large flat baking tray (30cm x 41cm) and place into the blast freezer for at least 10 minutes until required.
Coffee Mousse (Contd.)
- Transfer the mousse into a piping bag. Remove the coffee gel logs and the rectangular log mould from the blast freezer (still on the baking rack over a baking tray).
- Pipe a bottom layer into at least 3 of the rectangular log moulds, place a frozen log of coffee gel inside, then pipe over more coffee mousse to cover and fill the mould. Scrape the excess with a palette knife to level.
- Transfer the filled moulds to the blast freezer to freeze until required.
Macadamia Mousse
- Bloom gelatine in a small bowl of iced water and set aside until pliable.
- Place the milk into a small saucepan over medium high heat and bring it to a boil.
- In a separate bowl, whisk together egg yolk and sugar until combined.
- In a microwave-safe bowl, microwave the chocolate in 15-30 second increments until melted. Work the chocolate with the spatula until smooth and shiny and set aside.
- Drain softened gelatine and squeeze to remove excess water, set aside.
- While whisking by hand, pour the hot milk over the yolk mixture.
- Transfer the mixture back into the saucepan and bring it to 80°C while continuously stirring. Add the bloomed gelatine, stirring to dissolve.
- Using a fine sieve, strain the mixture over melted chocolate and whisk to emulsify.
- Allow the mixture to cool to 47°C .
- In the meantime, in the bowl of a stand mixer fitted with a whisk attachment, combine cream, macadamia purée and wattleseed and beat to just soft peaks.
- Once the mousse base reaches the desired temperature, add the macadamia cream and fold through.
- Leave in bowl at room temperature until it’s time to assemble the banksia pod.
Macadamia Base (Contd.)
- Remove dough from blast freezer still on the frozen tray.
- Using the frozen tray to keep it chilled, firstly peel off and put back the baking paper to ensure it doesn’t get stuck, flip it over and remove the second piece of baking paper.
- Working quickly whilst still frozen, straighten the side and bottom with a knife and cut out at least 6 rectangles the same size as the silicon rectangle insert mould (1.4cm x 7.6cm).
- Still working quickly, line a perforated baking tray with a perforated silicon mat, place the cut rectangles on top, then cover with a second perforated silicon mat and bake in the combi oven for 10 minutes.
- When cooked, remove top silicon mat and allow to cool.
Assembling the Banksia
- Transfer the Macadamia Mousse into a piping bag.
- Remove the silicon banksia mould (with the rack and tray) and the frozen Espresso gel & Coffee Mousse Inserts from the blast freezer.
- Starting with the mould closest to you and skipping the ones in between, pipe Macadamia Mousse into 3 cavities, filling approximately 90% of the mould. Tap the mould solidly on the bench to help fill gaps and remove air bubbles.
- Remove an Espresso Gel & Coffee Mousse Insert from the mould and forcefully push it down into the banksia mould, helping to spread the mousse into all the banksia crevices.
- Place a Macadamia Base into the mould, pushing gently down Pipe over the top with more Macadamia Mousse then clean around the edges with a small offset spatula to flatten off.
- Place the filled Banksia mould back onto the baking rack into the blast freezer to set for approximately one hour.
Wattleseed Caramel
- Dice the cold butter and set aside in fridge.
- In a small saucepan, combine cream, glucose, wattleseed and salt, and bring to 90°C over high heat. Then remove from heat, cover with cling wrap, and leave to infuse for approximately 12 minutes.
- In a medium saucepan over medium-high heat, pour sugar over the base and leave to melt. As the sugar starts to caramelise, stir occasionally until caramel reaches 180°C and a deep amber colour.
- Strain the hot cream mixture into a medium bowl through a fine strainer, ensuring all the liquid is scraped through. Carefully, so that it does not bubble over, pour cream mixture back over the caramel. Stir over medium high heat until the mixture boils and is smooth and combined.
- Transfer caramel to a tray to cool until it drops to at least 45°C.
- When at 45°C, transfer to a stick blender cannister, add the xanthan gum and whilst blending gradually add the cold butter and blend through until melted and combined.
- Transfer caramel to a piping bag fitted with a 6mm round nozzle and place flat on a tray in the fridge for approximately 15 minutes.
Banksia Leaf Tuile
- Reduce combi oven temperature to 140°C, 100% moisture extraction, fan force 1
- Prepare 2 large flat baking trays, each with a silicon mat and an acetate leaf stencil.
- In a small saucepan over high heat, melt the butter then transfer to a Thermomix bowl.
- Add all remaining ingredients to the Thermomix and mix on a low speed until completely incorporated, approximately 1-2 minutes.
- Once combined, flatten the batter out over the leaf stencil with a small offset spatula.
- Make at least 15 leaves, ensuring you have at least 5 of 8cm and 4 of 10cm leaves.
- Remove the template. Bake the tuile at 140°C for 6 minutes.
- Working quickly while still warm, with the side of a palette knife press a centre line down the middle of each leaf, then create curves upwards, shaping the tuile into organic leaf shapes. You may use a heat gun to gently reheat if they become unworkable.
- Transfer tray of tuile to fridge and cool until required.
Wattleseed Chocolate Stem
- To temper the dark chocolate, place dark chocolate into a large microwave safe plastic bowl. Place in the microwave and microwave in intervals of approximately 30 then 15 seconds, to melt until 50% of the chocolate is melted. Work the chocolate with the spatula until smooth and shiny. You may use a heat gun to gently heat the melted chocolate if the lumps are not melting.
- Workable temperature of the chocolate is 29-30 °C. Use your heat gun as required to gently warm the tempered chocolate.
- Prepare some small pieces of baking paper (approximately 10cm x 6cm), a silicon mat lined baking tray, a scourer, heat gun and a pair of plating tweezers. Transfer these with the tempered chocolate and cooled Wattleseed Caramel to the nitrogen bench.
- Pipe the set caramel in an 8cm length onto a very small piece of baking paper. Very carefully drop the piped caramel (still on the baking paper slip) into the bowl of liquid nitrogen, until it starts to curl and freeze on the outside (approximately 8-10 seconds) but not become too brittle and break. Quickly remove with tweezers and place directly into the tempered chocolate to coat.
- Remove chocolate coated caramel onto the silicon lined tray and use the scourer to roughen up the chocolate to resemble bark.
- Make at least one stem. Set aside at room temperature on your bench until required.
- Pour a small amount of warmed chocolate into two baking paper cones and fold over the end multiple times to seal. Reserve in the dehydrator for assembling the Banksia Stem.
Painting the Banksia Leaf Tuile
- Transfer cooled Banksia Leaf Tuile to the spray station. Remove airbrush from dehydrator.
- Fill the chamber of an airbrush gun to capacity with green airbrush colour, then fit the lid. Test the distribution.
- From a distance, use the air brush to lightly spray both sides of the leaves with layers of forest green. Tip out excess colour from the airbrush gun.
- Fill the chamber of an airbrush gun with some brown colour, then fit the lid. Test the distribution.
- From a distance, use the air brush to lightly spray both sides of the leaves with accents of woodland brown.
- Tip out excess colour from the airbrush gun and set aside.
- Leave 5 x 8cm, 4 x 10cm Banksia Leaf Tuile leaves to dry on the bench and reserve at room temperature until required for plating.
Painting the Banksia Pod
- Remove the Banksia mould still with the rack and tray from the blast freezer and carefully check to ensure it is completely frozen.
- If frozen solid, carefully demould the Banksia Pod closest to you. Reserve demoulded banksia in blast freezer until required.
- Working quickly, transfer the frozen Banksia Pod on the rack and tray to the spray station.
- Fill the chamber of the airbrush with forest green airbrush colour, then fit the lid and test the distribution on the wall.
- Spray the Banksia Pod lightly from a distance with a little green colour. Tip out excess colour.
- Fill the chamber of the airbrush with some woodland brown airbrush colour, then fit the lid and test the distribution on the wall.
- Spray the banksia lightly from a distance with a little brown colour. Carefully roll to reach each side without damaging the pod.
- Fill the chamber of the airbrush with some mushroom grey airbrush colour, then fit the lid and test the distribution on the wall.
- Spray the Banksia Pod lightly from a distance with a little grey colour. Tip out excess colour.
- Transfer banksia pod back to your work bench.
Assembling the Banksia Pod
- With the pointy end towards the top, place the Frozen Banksia Pod at 12 O’Clock pointing vertically towards the top of the serving plate, leaving enough room below for the stem.
- With the flattest side to the bottom of the plate, carefully insert the Banksia Stem into the base of the Banksia Pod.
- Remove the tempered chocolate baking paper cone from the dehydrator.
- For the leaves, cut the tip off the cone 2mm in diameter and use the chocolate in the cone as glue. Apply a blob of chocolate to the base (thin end) of a Banksia Leaf Tuile. Working from the top down, and leaving 1/3 of the base of the stem bare, stick the leaves along the top two thirds of the Wattleseed Chocolate Stem. Use the magic freeze spray to help each leaf stick.
- Repeat until 2/3 of the stem is covered with the Banksia Leaf Tuile.