


Back
Trio of Fruits
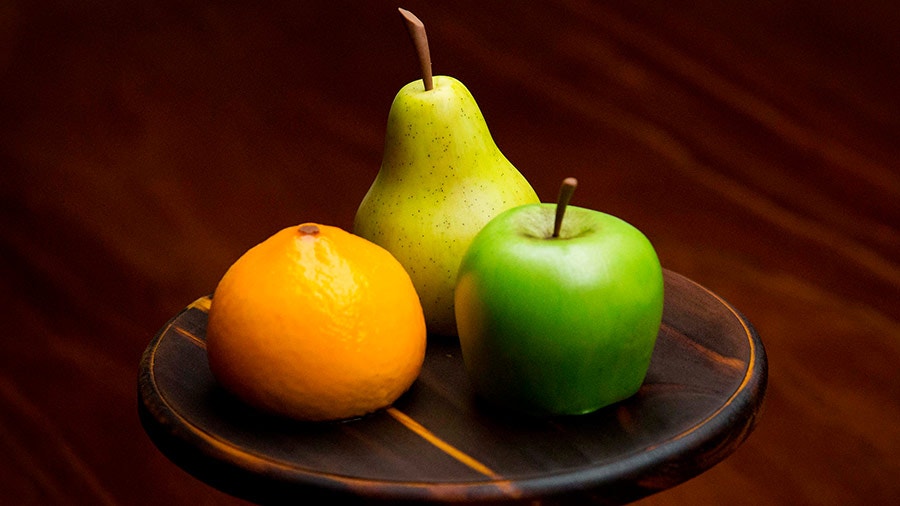

Recipe by Kirsten Tibballs
This isn’t your average bowl of fruit.
- Steps
- Ingredients
Ingredients
Apple - Calvados Sugar Crusted Liquor
Vanilla Mousse
Hazelnut Dacquoise
Apple - Caramel
Apple - Sautéed Apple
Mandarin – Mandarin Jelly
Mandarin – Mandarin Cream
Pear – Chocolate Ganache
Pear – Honey Pears
Apple Stem, Pear Stem and Mandarin Peduncle
Apple – Chocolate Coating
Pear – Chocolate Coating
Mandarin – Coating
Apple – Decoration
Pear – Decoration
Select All
Steps
- Preheat one oven to 175C. Preheat a second oven to 80C. Ensure water bath with mandarin glaze is preheated to 70C.
- For the Apple – Calvados Sugar Crusted Liquor, fill a wooden box by sieving wheat starch through a large drum sieve into the box, pushing the starch through with your hands, and use a metal ruler to compact the starch down so that it is quite compact and completely level on the surface. Do not overpack the box; the starch should be packed firm but still malleable enough for the mould to make an impression. Place the box onto a large, thin baking sheet.
- Using the plaster mould, and pressing down to the edge of the dome, make 9 impressions, about 4cm apart from each other, being careful not to crack the impression itself or the starch surrounding the impression.
- Fill a medium stainless steel bowl with 1 cup of additional starch.
- Turn the oven set to 80C off. Place the box of starch and the bowl of starch into the turned off oven, until warm, about 15-20 minutes.
- Place a medium stainless steel bowl into the oven preheated to 175C to warm up.
- Place the sugar, water and cinnamon quills into a clean, small, copper pot over medium heat and bring to 115C. Use a wet pastry brush to brush down the sides of the pot to prevent crystallisation.
- Remove the stainless steel bowl from the oven and place onto the bench. The bowl should not be too hot to handle with hands; if it is, allow to cool slightly.
- Once the sugar has reached temperature, pour into the warmed bowl, then place the empty saucepan back over low heat.
- Place the Calvados into the saucepan over low heat to warm, being careful as it may flame, then pour the warmed Calvados over the sugar syrup.
- Pour the Calvados syrup mixture back into the pot then back into the warm bowl, then repeat this pouring process a further 3 times to temper the mixture, being careful not to agitate the sugar too much.
- Remove the cinnamon sticks from the mixture and transfer mixture into a metal liquid depositor. Remove the starch box and the stainless steel bowl of extra starch from the oven. Deposit small amounts of the Calvados syrup mixture into the impressions in the starch box, about 3mm from the top, being careful not to overfill.
- Immediately sieve a light coating of the extra, warmed starch over the prepared liquors, in an even layer, so that they are fully coated. Ensure that there are no raised areas of starch. If there are raised areas, spoon off gently, but do not smooth over or press into the starch. Place the tray into a safe and stable area and set aside to sit for 1 ½ hours.
- Place another large, thin baking sheet on top of the starch and, in one quick motion, flip it over. Leave the tray aside for a further1 ½ hours.
- After the second period of 1 ½ hours, in one quick motion, flip the trays and box over again so that the box is facing upwards. Carefully remove the top baking sheet.
- Sit a drum sieve, upside down, on a baking tray lined with baking paper. Working very carefully, use an offset palette knife to scoop a circle, approximately 4cm in diameter, around the first liquor. Use the palette knife to gently remove one liquor at a time and place, flat side down, onto the drum sieve. Gently brush the liquors with a pastry brush to remove excess starch and then transfer liquors to a tray lined with baking paper.
- Place the cocoa butter and chocolate into a microwave safe bowl and melt in 30-second bursts in the microwave until half of the solid pieces have melted.
- Remove the bowl from the microwave and stir the mixture until completely melted and continue to stir until mixture reaches 32C.
- Slide a bent dipping fork to pick up one of the sugar crusted liquors, so that half of the liquor is sitting off the tip of the fork. Gently lower into the melted chocolate mixture, then lift up the fork and drag it through the chocolate over the liquor to coat. Pick up the liquor and lift it out of the chocolate. Gently agitate the fork in an up and down motion to allow the excess chocolate to drip off.
- Place the fork down onto a tray lined with baking paper and gently pull the fork back to release from the chocolate, swipe the fork to the left to detach completely from the liquor.
- Use paper towel to wipe the dipping fork completely clean before dipping the next liquor. Continue this process until you have at least one completely coated and sealed Sugar Crusted Liquor, free from leaks. Set tray aside on the bench until needed.
- For the Vanilla Mousse, combine 600g of the cream, vanilla bean and seeds and cinnamon in a medium saucepan over medium heat and bring to the boil. Once boiling, remove from the heat, cover the surface of the mixture with baking paper and set aside to cool and infuse in the saucepan for 30 minutes. Strain through a fine sieve then set aside on the bench until needed later on.
- Meanwhile, for the Hazelnut Dacquoise, measure out 50g of the roasted and peeled hazelnuts, place into the food processor and process until finely chopped.
- Sift the almond and hazelnut meals, icing sugar, plain flour and gingerbread spice mix through a sieve into a medium bowl, mix to combine, then set aside.
- Place the egg whites and cream of tartar into a stand mixer fitted with a whisk attachment and whisk to stiff peaks. With the mixer running, gradually add the caster sugar and continue to whisk until the sugar has dissolved, about 1 minute.
- Remove the mixer bowl from the stand mixer and use a spatula to fold through the sifted dry ingredients until fully combined.
- Transfer the mixture to a piping bag fitted with a 10mm round piping nozzle.
- Lightly spray a baking tray with canola spray then place the circular dacquoise template onto the tray. Lightly spray the template with a little more canola spray and top with a sheet of baking paper. The template will be visible through the sheet of baking paper.
- Using the template, pipe 30mm discs onto the template, ensuring that the tops of the dacquoise do not have a peak. Sprinkle the discs with the chopped roasted hazelnuts and place into the oven at 175C to bake for 8 minutes.
- Remove from the oven and allow to cool slightly, then set aside in the freezer until needed.
- For the Apple – Caramel, sprinkle the caster sugar in an even layer onto the base of a small saucepan over low heat. Gently swirl the pan until melted then stir gently with a silicone spatula until amber in colour.
- Meanwhile, place the cream, vanilla seeds and salt into a small saucepan and bring just to the boil then remove from the heat.
- Remove the caramelised sugar from the heat. Pour the boiled cream mixture over the caramel and whisk to combine. Add the glucose and butter and continue to whisk until completely melted and combined. Pour the caramel into a bowl and place a sheet of cling film onto the surface of the caramel to cover. Set aside on the bench to cool. Once cool, transfer to a piping bag until needed.
- For the Apple - Sautéed Apple, peel and brunoise the apple, then measure out 100g of apple brunoise and place into a small glass bowl. Place the remaining ingredients into a small frying pan over low heat and sauté until the butter has completely melted. Increase the heat to medium, then add the apples and sauté, stirring regularly until just tender, about 2-3 minutes.
- Pour the apple mixture into a small bowl then place into the blast chiller immediately to stop the cooking process, about 2-3 minutes. Once cooled, set aside in the fridge until needed.
- For the Mandarin - Mandarin Jelly, place the gelatine into a bowl of cold water and set aside to bloom.
- Place the sugar, water and vanilla seeds into a small saucepan over medium heat and bring to the boil, stirring occasionally, then remove from the heat.
- Squeeze out gelatine to remove excess water then add to the hot sugar syrup and stir until completely melted. Add in the defrosted mandarin purée and stir until combined. Strain mixture, then transfer mixture to a measuring jug.
- Sit a small medallion flexipan onto a large tray. Carefully pour the mixture into half of the moulds, all the way up to the top. Place into the blast chiller until frozen, about 12-15 minutes.
- Once frozen, remove from the blast chiller and unmould 4 of the mandarin jellies. Sit the mandarin jellies on 4 of the Hazelnut Dacquoise, so that the flat bottom of the jellies sits on the rough hazelnut top of the dacquoise. Place back into the freezer until needed.
- For the Mandarin Cream, sit the large medallion flexipan silicone mould onto a baking tray and set aside until needed.
- Place egg yolks, sugar, salt, mandarin juice and mandarin zest into a medium saucepan over low heat. Whisk vigorously until the mixture boils, then once boiling, continue to whisk for a further minute.
- Remove from the heat, then transfer to a stand mixer fitted with a whisk attachment. With the mixer running on half speed, add the butter, one cube at a time until all of the butter is incorporated. Once all of the butter is incorporated, turn the mixer up to high and continue to mix until the mixture has cooled completely, about 10-12 minutes.
- Transfer the mixture to a piping bag. Snip the tip of the bag to 1cm wide and pipe the mixture into the large medallion flexipan moulds, all the way up to the top. Level off the cream with an offset palette knife, then place into the blast chiller until frozen solid, about 25-30 minutes.
- Once frozen, unmould the Mandarin Creams onto a baking tray lined with baking paper. Insert a toothpick into the flat bottom of each Mandarin Cream, taking care not to push the toothpick all the way through. Place back into the blast chiller until needed.
- Place the cocoa butter and chocolate into a microwave safe bowl and cook in 30-second bursts until half of the solid pieces have melted. Stir vigorously until completely melted and continue to stir vigorously until mixture reaches 32C.
- When chocolate is at temperature and Mandarin Creams are completely frozen solid, remove the frozen Mandarin Cream inserts and, holding by the toothpick, dip each into the bowl of melted chocolate mixture, then upturn the insert and gently tap to remove excess chocolate.
- Gently push the toothpicks into the polystyrene blocks then place the block into the freezer until needed.
- For the Pear - Chocolate Ganache, place the cream and invert sugar into a small saucepan over low heat and bring to the boil.
- Meanwhile, place the couverture chocolate into a bowl. Once the cream mixture is boiling, remove from the heat and pour over the couverture chocolate and whisk until emulsified. Once emulsified, transfer ganache to a pouring jug.
- Remove the tray of small flexipan disc moulds from the blast chiller and pour the ganache into the remaining half of the moulds. Level off with a spatula then place in the blast chiller to set until needed.
- For the Pear – Honey Pears, peel and cut the pears into 8mm cubes and measure out 100g of the pear.
- Place the butter, honey, cinnamon and the vanilla seeds into a small frypan over low heat until melted. Add the pear cubes, increase heat to high, and sauté until slightly softened, but still holding shape about 3-5 minutes. Remove from the heat and immediately place into a fine chinois to drain off excess liquid.
- Place the defrosted pear purée into a small bowl. Add the drained pears and stir through until combined. Set aside in the fridge until needed.
- To finish the Vanilla Mousse, place the gelatine into a bowl of cold water and set aside to bloom.
- Measure out 115g of the sugar syrup and place into a small saucepan over medium heat and stir until all the sugar has dissolved, continue to cook to 121C.
- Meanwhile, place the egg yolks into a stand mixer fitted with a whisk attachment and whisk until pale.
- Place the remaining 520g of cream into the bowl of a stand mixer fitted with a whisk attachment and whip to soft peak stage.
- Once the sugar has reached temperature, with the mixer running, slowly pour the sugar into the egg yolks until pale and fluffy. Continue to mix until the mixture cools slightly.
- With the mixer running, slowly pour in the reserved strained cream infusion until combined. Transfer the egg mixture to a large mixing bowl.
- Squeeze out gelatine to remove excess water and place into a heatproof bowl. Microwave in bursts of 5 seconds until melted, ensuring not to boil the gelatine.
- Add a large spoonful of the egg mixture into the melted gelatine and fold through, then pour the gelatine-egg mixture back into the large bowl of egg mixture and fold through until fully combined.
- Transfer the mixture to a clean large bowl and set over an ice bath, whisking until mixture reaches 30C. Once the mixture has cooled to 30C, use a spatula to fold through the semi-whipped cream until well combined. Divide mixture amongst 3 piping bags and set aside on the bench until needed.
- To assemble the Apple, remove the Hazelnut Dacquoise from the freezer. Take the Apple – Caramel and pipe a coil onto the rough hazelnut top of 4 of the frozen dacquoise discs, not piping to the very edge, then place back into the freezer.
- Pipe the Vanilla Mousse into the apple mould to 2/3 up the sides of the mould. Use a teaspoon to spread the mousse up the sides of the mould to help eliminate air pockets and coat all the sides of the mould evenly.
- Pipe 70g of the Vanilla Mousse into the bowl of the Sautéed Apple and stir to combine then transfer to a piping bag. Trim the tip of the piping bag to 1cm wide and pipe the mixure into the mould to halfway up the mould.
- Gently lower and place a Calvados Sugar Crusted Liquor into the mould, dome side down, then pipe more of the apple and mousse mixture into the mould, about 2mm from the top. Take one of the caramel dacquoise pieces and place, caramel side down, onto the mousse so that the flat side of the Hazelnut Dacquoise sits flat and level with the top of the mould. Use a palette knife to clean off any excess mousse then place the mould into the blast chiller until needed.
- To assemble the Mandarin, first remove the chocolate coated Mandarin Creams from the freezer and set aside to thaw slightly until needed.
- Pipe the Vanilla Mousse into the mandarin mould to 2/3 full. Use a teaspoon to spread the mousse up the sides to the top of the mandarin mould to help eliminate air pockets, ensuring the sides of the mould are evenly coated.
- Gently lower and place the coated Mandarin Cream into the mould, flat side up, and use fingertips to gently release the mandarin cream from the toothpick. Pipe a little mousse in to cover the mandarin cream. Take one of the jelly dacquoise pieces and press, jelly side down, gently into the mousse so that the flat side of the Hazelnut Dacquoise level with the top of the mould. Use a palette knife to clean off any excess mousse then place the mould into the blast chiller until needed.
- To assemble the Pear, place 4 Pear – Chocolate Ganache discs, flat side down, onto the rough hazelnut top of 4 of the frozen Hazelnut Dacquoise pieces, then place into the blast chiller until needed.
- Pipe the Vanilla Mousse into the pear mould to 2/3 up the mould. Use a teaspoon to spread the mousse up the sides of the moulds to help eliminate air pockets.
- Carefully spoon a dessertspoon of the Honey Pears into the mould. Pipe some of the Vanilla Mousse on top of the Honey Pears then gently place a ganache – dacquoise disc, ganache side down, into the mousse and gently press so that the mousse and flat side of the Hazelnut Dacquoise is flat and level with the top of the mould. Use a palette knife to clean off any excess mousse then place the mould into the blast chiller until needed.
- For the Apple Stem, Pear Stem and Mandarin Peduncle, place all ingredients into a food processor and mix until the mixture clumps together into a ball and forms a pliable paste, about 2-3 minutes. Remove the paste from the processor and break up into several pieces, then return to the processor and continue to process until the paste forms a ball, is completely smooth and there are no longer any specs of chocolate.
- For the Mandarin Peduncle, lightly dust a marble board with a little finely sieved icing sugar. Take a small amount of the chocolate paste mixture and use fingertips to knead slightly and make the paste malleable. Roll the portion out on the lightly dusted marble to a thickness of approximately 3mm thick. Cut out peduncles with the 4mm flower cutter then set aside on a small tray lined with baking paper until needed.
- For the Apple Stem, take another portion of the mixture and use fingertips to knead slightly and make the paste malleable. Place the piece onto a marble surface. Roll into a long piece, then cover with a plastic sheet and continue to roll into a thin stem, putting slightly more pressure on one end so that one end is thinner than the other. Cut the thicker end on an angle so that the stem is approximately 35mm long. Working quickly, curve the stem, before it sets, around the base of a 75mm small bowl to create an apple stem. Set aside on a small tray lined with baking paper until needed.
- For the Pear Stem, take another portion of the mixture and use fingertips to knead slightly to make the past malleable and place it onto the marble surface. Roll into a long piece, then cover with a plastic sheet and roll into a long stem, putting slightly more pressure on one end so that one end is thinner than the other. Cut the thicker end on an angle so that the stem is approximately 25mm long. Working quickly, curve the stem, before it sets, around the base of a 75mm small bowl to create a pear stem. Set aside on a small tray lined with baking paper until needed
- For the Apple – Chocolate Coating, place the white chocolate into a microwave safe bowl and heat in 30-second bursts, stirring between each burst, until half of the chocolate has melted.
- Remove from the microwave and stir vigorously until all of the chocolate has melted. If some solid pieces of chocolate still remain, gently apply the heat gun and continue stirring until all the chocolate is melted and smooth.
- Sieve the oil based colour with a fine sieve into the chocolate, add in the grapeseed oil and stir well to combine. Transfer to a stick blender canister and set aside on the bench until needed.
- For the Pear – Chocolate Coating, place the white chocolate into a microwave safe bowl and heat in 30-second bursts, stirring between each burst, until half of the chocolate has melted.
- Remove from the microwave and stir vigorously until all of the chocolate has melted. If some solid pieces of chocolate still remain, gently apply the heat gun and continue stirring until all the chocolate is melted and smooth. Place the scraped vanilla seeds into a small bowl and add a little of the melted white chocolate and stir to combine.
- Heat a sieve with a heat gun. Strain the white chocolate vanilla mixture into the bowl of the remaining white chocolate and stir until fully incorporated. Sieve the oil based colour into the chocolate and stir until fully combined, then add the grapeseed oil and stir until well combined. Transfer to a stick blender canister and set aside on the bench until needed.
- Remove the apples from the blast chiller. Gently push 3 toothpicks, close together, into the base of the frozen apple, ensuring not to push the toothpicks in too far and pop the sugar crusted liquor. Carefully de-mould the apple and, holding by the toothpicks, dip the frozen apple shaped mousse into the Apple – Chocolate Coating, remove from the coating and turn the apple upright. Using your finger, gently press a slight depression into the top of the apple.
- Stick each apple upright, on the toothpicks, into individual polystyrene blocks. Clean the base with a small knife to remove any drips then set aside on the bench to set.
- Remove the tray of pears from the blast chiller. De-mould the frozen pear shape and gently push 3 toothpicks into the base of the frozen pear. Dip into the Pear - Chocolate Coating, remove from the coating and turn the pear upright. Using your finger, gently press a slight depression into the top of the pear.
- Stick each pear upright, on the toothpicks, into individual polystyrene blocks. Clean the base with a small knife to remove any drips and leave to set.
- Remove the frozen mandarin from the blast chiller. De-mould the frozen mandarin, then gently push 3 toothpicks close together into the base of the mandarin. Turn the mandarin over and stick each mandarin upright, on the toothpicks, into individual polystyrene blocks. Place the blocks back into the blast chiller until needed.
- For the Mandarin - Coating, take the mandarin glaze out of the waterbath and the warm spray gun out of the dehydrator. Pour glaze into the spray gun canister to ½ full then seal the top of the spray gun canister with the lid, do not tip the spray gun cannister upside down. Place one of the mandarins set on a block onto the turntable and into the spray booth.
- Hold the spray gun approximately 25cm away from the mandarin. Turn the mandarin slowly, spraying the mandarin until it is completely coated with a layer of the glaze. Allow the mandarin glaze to set for 30 seconds then repeat the glazing process to achieve a second, even layer. Continue this glazing process until a solid colour is achieved. Use a small knife to trim off any drips of glaze from the base of the mandarin.
- Once glaze is set, set the mandarin aside in the blast chiller until needed.
- To finish the Apple decoration, use a paper towel to gently remove any condensation from the chocolate coating on the apple.
- Using a small metal tray as a palette, place approximately 3-4g of the grapeseed oil to one side of the tray. Place the powdered colour near the oil and use a soft paintbrush to dab a little of the colour into the oil and apply to the apple, mixing and blending as required to achieve the desired finish.
- Set the apple aside for 3 minutes to allow the apple to absorb the first layer of oil. Brush with a second layer using the same technique and allow to sit for a further 3 minutes.
- Using a clean dry, soft brush, brush a little of the metallic silver powder over the apple.
- Place a toothpick in the top of the apple, in the centre. Place two fingers under the apple and remove the toothpicks. Insert an offset palette knife under the apple and holding the top toothpick for balance, gently place the apple onto the display plate.
- Using a very fine, soft paint brush, apply a little cocoa powder to the centre top of the apple, surrounding the top toothpick.
- Remove the top toothpick and gently push a metal skewer into the top centre of the apple to create a hole for the stem. Gently push the chocolate Apple Stem inside the hole.
- To finish the Pear, use a paper towel to gently remove any condensation from the chocolate coating on the pear.
- Using the small metal palette tray, place a little more grapeseed oil onto the tray. Add the powdered yellow colour near the oil and use a soft paintbrush to dab a little of the yellow and green colour into the oil and apply to the pear, mixing and blending as required to achieve the desired finish.
- Set the pear aside for 3 minutes to allow the pear to absorb the first layer of oil. Brush with a second layer using the same technique and allow to sit for a further 3 minutes.
- Add a little of the red colour to the palette tray and use the same painting technique to add red highlights to the pear, mixing and blending as required to achieve the desired finish.
- Place a toothpick in the top of the pear, in the centre. Place two fingers under the pear and remove the toothpicks. Insert an offset palette knife under the pear and holding the top toothpick for balance, gently place the pear onto the display plate.
- Remove the top toothpick and gently push a metal skewer into the top of the pear to create a hole for the stem. Gently push the chocolate Pear Stem inside the hole.
- Remove the Mandarin from the blast chiller. Place a toothpick in the top of the mandarin, in the centre. Place two fingers under the mandarin and remove the toothpicks. Insert an offset palette knife under the mandarin and holding the top toothpick for balance, gently place the mandarin onto the display plate.
- Remove the top toothpick and place a chocolate Mandarin Peduncle into the deep impression on the top of the mandarin and press gently until it sits flat.