


Back
Core-teser
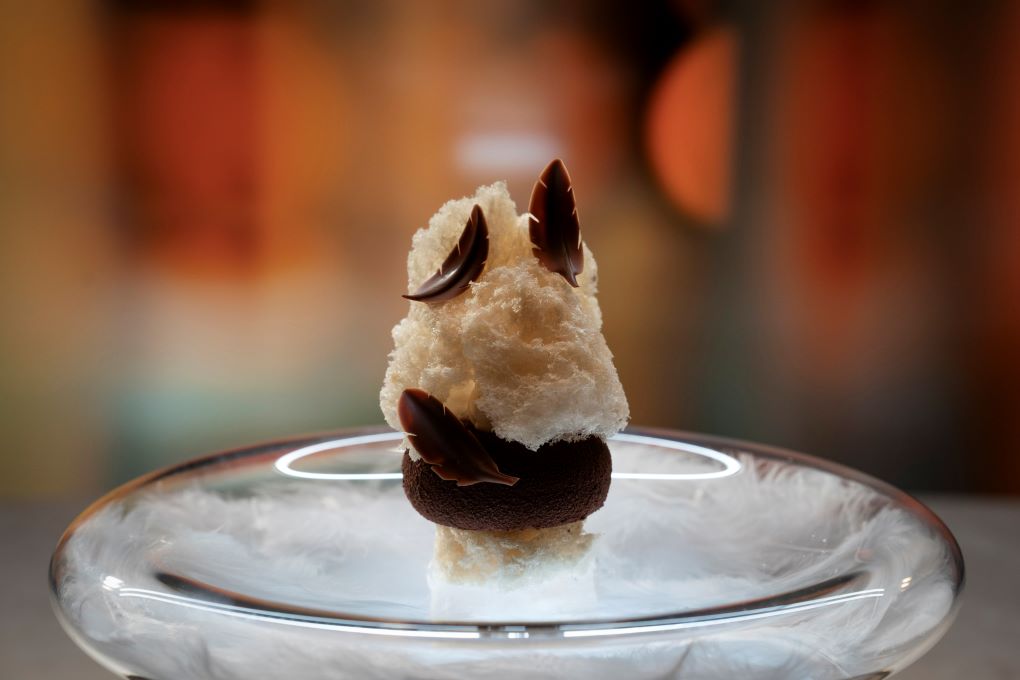

Recipe by Clare Smyth
Try Clare Smyth's Core-teser.
- Steps
- Ingredients
Ingredients
Hazelnut Ice Cream
Aerated Chocolate Discs
Chocolate Feuilletine Base
Hazelnut Ice Cream (Continued)
Milk Chocolate Cremeux
Malt Mousse
Milk Chocolate Feathers
Malt Sugar Puff
Hazelnut Caramel
Chocolate Spray
Select All
Steps
- Preheat combi oven to 180°C full fan, 100% extraction.
- Pre-chill blast freezer to -40°C
- Pre-heat dehydrator to 41°C
- Place 500ml ISI siphon cannister in the dehydrator to warm.
- Place 2 x Fresh Mousse beakers in the blast freezer to chill.
Hazelnut Ice Cream
- Toast the hazelnuts on a baking tray in the oven until golden brown, approximately 6 minutes.
- Combine milk and cream in a small saucepan and warm to 50°C.
- Remove hazelnuts from oven and change the combi oven setting to 180°C, 3 fan (no humidity, no extraction).
- In a large jug add warmed milk, cream and the hazelnuts. Pulse using a stick blender to break up the nuts to a medium coarse consistency (like cocoa nibs).
- Cover with cling wrap, set aside at room temperature and allow to infuse for 30 minutes.
Aerated Chocolate Discs
- 1/3 fill a medium saucepan with water and bring to the boil over high heat.
- Place chocolate and cocoa butter in a medium bowl and place over the saucepan of simmering water, stirring occasionally until melted and reaches 45°C.
- Grease and line the base of a 30cm x 13cm vacuum seal container with canola spray and baking paper.
- Remove bowl of melted chocolate from heat and set aside. Reserve the saucepan of simmering water off the heat.
- To temper the chocolate, pour approximately 2/3 of the chocolate onto the marble slab and set the remaining chocolate aside. With a large offset palette knife and a chocolate scraper, spread the chocolate across the marble and scrape it back together. Continue moving chocolate around until the temperature reaches 26°C.
- Transfer this chocolate, avoiding any firmly set chocolate along the edges of the marble, back into the reserved bowl of chocolate and mix until uniform in consistency. The combined chocolate should be at 32°C and tempered. If not, repeat the tabling process until the temperature drops. If the overall temperature of chocolate exceeds 35°C then warm to 45°C and start the tempering process again.
- Remove ISI siphon cannister from the dehydrator. Working quickly so chocolate doesn’t set, transfer into ISI gun (without a nozzle). Hold the ISI gun upside down and charge with 2 cream chargers.
- Shake up and down for approximately 30 seconds. You should feel the chocolate shaking up and down as you do so.
- Making a zig zag pattern to create even layers, very lightly press on the lever and dispense the mixture into the vacuum seal container.
- Fit the lid ensuring the seal is tight, then tighten with 2 pull tie down straps around the container.
- Carefully transfer the container, being careful not to knock out any air, into a sous vide vacuum chamber. Press Program 2, close lid and compress until the chocolate doubles in size, hitting the stop button when it does so. This will create an aerofoam texture. Note, if the chocolate collapses, chocolate will need to be brought back to temperature again and the process repeated.
- After 15 minutes turn the machine back on to complete cycle and transfer the container of Aerated Chocolate to the blast freezer to chill for 10-15 minutes until set. Then remove and store in fridge until required.
Chocolate Feuilletine Base
- Place a silicon mat on an edgeless baking tray and line with baking paper.
- Melt the cocoa butter in a medium bowl over a pan of simmering water, then add chocolate and stir through.
- Once chocolate is melted, add praline hazelnut paste and salt, and stir through to combine until smooth. Remove from heat.
- Add the feuilletine and fold mixture together.
- Pour onto lined silicon mat, cover with another sheet of baking paper, then using a rolling pin bash out the mixture and spread 2mm thick. Allow to set in the fridge.
Aerated Chocolate Discs (Continued)
- Prepare an upended heat gun on the bench and a large serrated pastry knife.
- Once set, transfer the Aerated Chocolate back to the bench. Untie, and release pressure valve in centre of lid by lifting with the edge of a knife. Remove lid and turn out onto a board. You may need to run a palette knife around the edge to help removal.
- To create the discs, first gently warm the large serrated knife and use to carefully cut Aerated Chocolate into 1cm thick slices. The knife must be just warm and clean for each slice.
- Then punch out at least 2 discs with a 4.5cm diameter ring cutter.
- Set aside in a baking paper lined container with a lid, at room temperature, until required for assembly.
Hazelnut Ice Cream (Continued)
- Strain the Hazelnut Milk through a fine chinois into a medium bowl, pushing down with a small ladle to extract all the liquid (minimum 470 g). Discard the solids.
- Transfer 470g of Hazelnut Milk to a saucepan and place over high heat, bringing the Hazelnut Milkto a simmer. Discard remainder of Hazelnut Milk.
- Whisk the eggs, sugar and Frangelico together in a bowl, then gradually pour the Hazelnut Milk over the egg mixture while whisking continuously.
- Pour the liquid into a clean saucepan over a low heat, cook out to 82°C.
- Set up an ice bath in a medium bowl.
- Remove hazelnut egg mixture from the heat, add the xanthan gum and salt, and blend to combine with a stick blender.
- Strain the custard through a fine chinois into a medium bowl over ice bath and allow to cool to approximately 10°C.
- Divide into two Fresh Mousse beakers and reserve in the blast freezer for 1.5hrs or until set firm.
Milk Chocolate Cremeux
- Soften the gelatine in ice water for 6-8 minutes until pliable.
- In a bowl whisk the egg yolks.
- Heat the milk and cream in a small saucepan to a simmer. Once it’s hot, slowly pour over the egg yolks, whisking continuously.
- Return to the saucepan and gently heat, mixing continuously and cooking out until it reaches 83°C.
- Squeeze out the gelatine, add to mix and stir well to dissolve.
- Place the chocolate in a medium bowl and strain the mixture onto it, mix well to combine.
- Pour into a flat baking tray, cover with a layer of Go Between and allow the mix to cool at room temperature to 28°C.
- Stir well then transfer to a piping bag. Reserve at room temperature until required.
Malt Mousse
- Soften the gelatine in ice water for 6-8 minutes until pliable.
- Fill a large shallow chef’s pan with 1/3 water as a bain-marie. Place over medium high heat.
- Separate the eggs and weigh yolks into a stand mixer bowl.
- In a small saucepan, combine the malt with cream (a), then place the saucepan in the water-filled pan. Gently heat whilst carefully whisking to ensure the malt does not catch on the bottom of the pan.
- Squeeze out gelatine, stir through mix and whisk well to incorporate. Set mixture aside at room temperature and allow to cool to approximately 27°C.
- Combine the sugar and water in a small saucepan and bring the mixture to 118°C.
- Meanwhile, to make the pâte à bombe, on full speed, whisk the egg yolks in a stand mixer to double in volume. Slowly pour the hot syrup down the side of the bowl into the egg yolks and continue mixing to incorporate. Then, lower speed to medium-high and continue to whip until the pâté à bombe has almost doubled in volume and the bowl cools down to being somewhat warm to the touch. The mixture should be at ribbon stage and a light, glossy, shiny consistency.
- Combine cream (b) with double cream in a separate bowl of a stand mixer. Whisk gently on low speed to before soft peaks.
- In two parts, fold the pâte à bombe into the malt mixture and mix through until homogenous.
- Then, carefully fold the whipped cream in thirds into the malt mixture until well incorporated. Transfer into a piping bag and keep at room temperature ready for the assembly of the Core-teser.
To Assemble The Entremet
- Remove the Chocolate Feuilletine Base from the fridge. Peel back the baking paper on top to unstick, then flip over and remove baking paper from other side completely. Cut out at least 2 x 5cm diameter discs using a round cutter and place on a tray. Discard excess.
- Set a 6.5cm x 3cm silicon stone shaped mould onto a baking rack, then set over scales and pipe 25g of Malt Mousse into each mould.
- Place the Aerated Chocolate Disc directly in the centre, submerging it by half.
- Pipe the Chocolate Cremeux around the Aerated Chocolate and on top, leaving a 2mm gap for the Feuilletine Disc. Moulds should be approximately 50/50 mousse to cremeux.
- Place Feuilletine Disc on top and gently press in so that it is completely flush with the top of the mould.
- Transfer mould to the the blast freezer to completely freeze until required.
Milk Chocolate Feathers
- Top up a medium saucepan 1/3 full with water and bring to the boil over high heat.
- Place chocolate in a medium bowl and place over the saucepan of simmering water, stirring occasionally until melted and reaches 45°C. Remove bowl from the saucepan.
- To temper, pour approximately two thirds of the chocolate onto the marble slab and set the remaining chocolate aside. With a large offset palette knife and a chocolate scraper, spread the chocolate across the marble and scrape it back together. Continue moving chocolate around until the temperature reaches 27°C.
- Transfer this chocolate, avoiding any firmly set chocolate along the edges of the marble, back into the reserved bowl of chocolate and mix until uniform in consistency. The combined chocolate should be at 30°C and tempered. If not, repeat the tabling process until the temperature drops. If the overall temperature of chocolate exceeds 35°C then warm to 45°C and start the tempering process again.
- Transfer tempered chocolate to a dariole mould. Place a small offset palette knife across the top to provide an edge to scrape excess chococolate from the knife. Wipe the bench with a damp cloth help adhere the acetate to the bench.
- Dip a small flexible paring knife into the tempered chocolate, scrape excess chocolate from one side of the knife. Then, without pressing down, touch chocolate onto the sheet of acetate, lift up slightly, then draw it back towards you to form the shaft and quill of a feather. The shaft should be approximately 4.5cm and the quill approximately 2cm in length. Make at least 6 well-formed feathers.
- Curving up the sides of the acetate to guide it through, slide the acetate into the bottom of a 6cm diameter PVC pipe, giving it a natural curve upwards. Transfer to fridge until set (approximately 10 minutes).
Malt Sugar Puff
- Prepare and line a flat baking tray with a silicon mat.
- Line the commercial vacuum machine with baking paper.
- Weigh out trehalose and glucose into a small saucepan.
- In a small bowl weigh out malt powder and water and whisk to combine. Add to saucepan of trehalose and glucose and whisk well to combine.
- Place mixture over medium heat, bring to the boil and heat the liquid to 128°C. Stir from time to time with a spatula.
- Meanwhile, make the royal icing. Add sifted icing sugar, egg whites and lemon juice to a small bowl and mix to a thick paste with a whisk.
- Transfer into a glass pinch bowl and weigh out 4g.
- Remove malt mixture from heat and carefully whisk in the 4g royal icing, ensuring it is well incorporated.
- Quickly pour mixture out onto a silicon mat, spreading out evenly with a spatula to form an approximately 3mm thick layer. Set aside and allow to cool and become brittle. Caramel should look shiny and homogenous.
- Once brittle, shatter with the butt of a palette knife and break into large shards.
- Place approximately 50g caramel shards close together in a single layer on lined tray. Place in combi oven, 180°C, 3 fan for 1 minute or until shards are just melted.
- Work quickly through the next few steps to create a tight round sphere that will be placed in the vacuum chamber to make the malt sugar puffs.
- Transfer the hot caramel and silicon mat to the bench.
- Use the silicon mat to protect hands initially and work quickly with the caramel whilst still at temperature.
- Quickly fold over one side of the mat followed by the other side, bringing the caramel together into a single mass. Continue to fold and unfold the sides of the mat (top, bottom, left and right sides), bringing the caramel together into a squarish shape. If it is still too hot to handle, use the silicon mat to protect your hands, but eventually it will cool down enough to handle. Fold, knead and roll the mass over itself, pressing it together each time. Continue to fold, knead and press in this way until the colour changes to a lighter golden pearl and caramel shows slight resistance to stretch.
- Quickly roll the edges out and over with your thumbs and tuck them underneath, forming a seam at the base. Repeat the motion with the open sides, tucking them out and under meeting at the seam underneath so that there are no raw edges. Quickly repeat until a stretched sphere is formed.
- Quickly place sphere into an empty vacuum chamber with seam side down. Press Program 2. Vacuum until it triples in size, keep cycle running for 2-3 seconds after the ball has stopped expanding. Quickly turn off the machine and allow to set for 10 minutes, then turn machine back on to finish cycle.
- Remove the malt sugar puff from the vacuum chamber. Whilst holding in your hand, carefully trim the skin of the outer shell with a small paring knife to expose the aerated inner.
- Cut the malt puff carefully into 2cm thick sheets to be used for the base. Use a 5.5cm disc to punch through sheets making at least two malt sugar puff bases. Use nicely shaped trim from punching base discs for the malt sugar puff shards for the top (can break remaining 2cm thick sheets into shards as well).
- For assembly of 1 Core-teser dish you will require 1 disc and 2 shards of approximately 9cm in length. Keep remaing puff.
- Set aside in separate baking paper lined air-tight containers with silica gel until required for plate up.
Milk Chocolate Feathers (Continued)
- Have a heat gun balancing upwards on the bench to heat your paring knife. Baking paper line a container with a lid.
- Carefully remove the feathers from the acetate. Holding the feather up with tweezers in one hand, heat the knife over the heat of the heat gun with the other, then mark 3 grooves on the bias evenly up each side of the feather. Mark at leat 6 feathers.
- Reserve feathers until required in a baking paper lined container with a lid in the fridge.
Hazelnut Caramel
- Place cream in a mini copper saucepan and gently heat to 40°C.
- In a separate mini saucepan on a medium high heat, add the sugar and make a dry caramel, cooking until sugar is melted and caramel is an amber colour.
- Remove from the heat and carefully, add in the warmed cream whilst whisking continuously to combine with a mini whisk.
- Add the salt, butter and oil, whisking continuously to emulsify.
- Allow to cool slightly then transfer to a small piping bag. Reserve at room temperature until required.
Hazelnut Icecream (Continued)
- Remove icecream from blast freezer and transfer beaker to the Fresh Mousse and churn. Churn at least one of the beakers.
- Return to freezer until required.
Chocolate Spray
- Top up your medium saucepan to 1/3 of water and bring to the boil over high heat.
- Prepare spray gun bottle and baking paper line a tray.
- In a medium bowl combine chocolate and cocoa butter. Place over saucepan of boiling water and melt together, stirring well to combine.
- Remove the pan from the heat and allow to slightly cool. Required temperature for spraying is 40°C.
- Remove the Entremet moulds from the blast freezer. To remove from mould, slightly pull edge of mould seal at base of Entremet to make a gap. Support top of Entremet with 3 flat fingers and then push out of mould. Remove at least 2 and place on a pizza tray.
- Smooth around the sides with your thumb to ensure centre seam and edges of your Entremet are smooth and without lines.
- Pour chocolate into spray bottle.
- Using a large tray, transfer spray bottle, Entremets and the same amount of dariole moulds to the spray station.
- Set each Entremet onto an upturned dariole mould.
- With gentle strokes, spray to coat in a thin, even layer. Adjust your angle to reach spray underneath the Core-teser. Spray at least 2 frozen portions.
- Transfer on a lined tray to the fridge and reserve the Core-tesers until required for assembling.
To Assemble the Dish
- On the feather stuffed serving plate, pipe a dot of Hazelnut Caramel onto the centre of the plate and add a Malt Puff Disc as the base.
- Place the sprayed Core-teser on top.
- Make a quenelle of Hazelnut Icecream and place on top of the Core-teser.
- Place a Malt Puff Shard on either side of the quenelle, encasing the Hazelnut Ice Cream.
- Dot with 3 dots Hazelnut Caramel then finish with the 3 Chocolate Feathers. With feather tips facing upward, place one on top of each shard, and then a lower one floating off the Core-teser.